Showing posts with label materials. Show all posts

Tuesday, June 11, 2013

Spring has Sprung

Well the worst of the cold weather passed with the end of March. April was a busy month, and a good bit of May was spent recovering from April. I did get to do some cleaning up. It's surprising what just a couple months of "I'll just put this here for now," will do. I have things looking much more organized now, but I couldn't get everything cleaned up before the urge to Do Something overcame me.

Experimenting with fiberglass cloth over the plank lands.

I'd been thinking a lot about how to finish the hull, and had decided to put a fiberglass skin over the plywood, but I wasn't quite sure how I wanted to do it. Other builders have put fiberglass and epoxy on each plank separately. This protects the faces of the plywood, but less protection to the more delicate edges. It allows the builder to keep the traditional "clinker" look where the planks overlap, but does not add any additional strength to that joint.

My main reason for using fiberglass is to protect the edges, so I've been thinking about using a continuous layer of fiberglass cloth to cover the planking. I'm also interested in the additional strength this will add. The epoxy glued overlaps are, in principle, plenty strong. In all my destructive tests, the plywood failed before the epoxy bond. But I know I have a few places where there is a gap between the planks that the epoxy didn't fill completely, though. The angle of my plank land must have been off a little bit. I've gone back to fill these in, but, as I'm planning to use the fiberglass anyway, a little extra piece of mind can't hurt.

I don't want to round over the edges of the planking more than I need to, so I made up a test piece from some scrap.

My System Three squeegee makes an appropriately sized fillet.

I rounded the corner with either a 1/8 inch radius or 3/16, and made a fillet with either my System Three squeegee or a tongue depressor. I'm using the lightest weight cloth I could find, 4oz., so it would conform more easily to the curves. The 3/16 radius with the squeegee worked all right.  It took a little massaging to get the cloth to adhere firmly, but in the end it did.
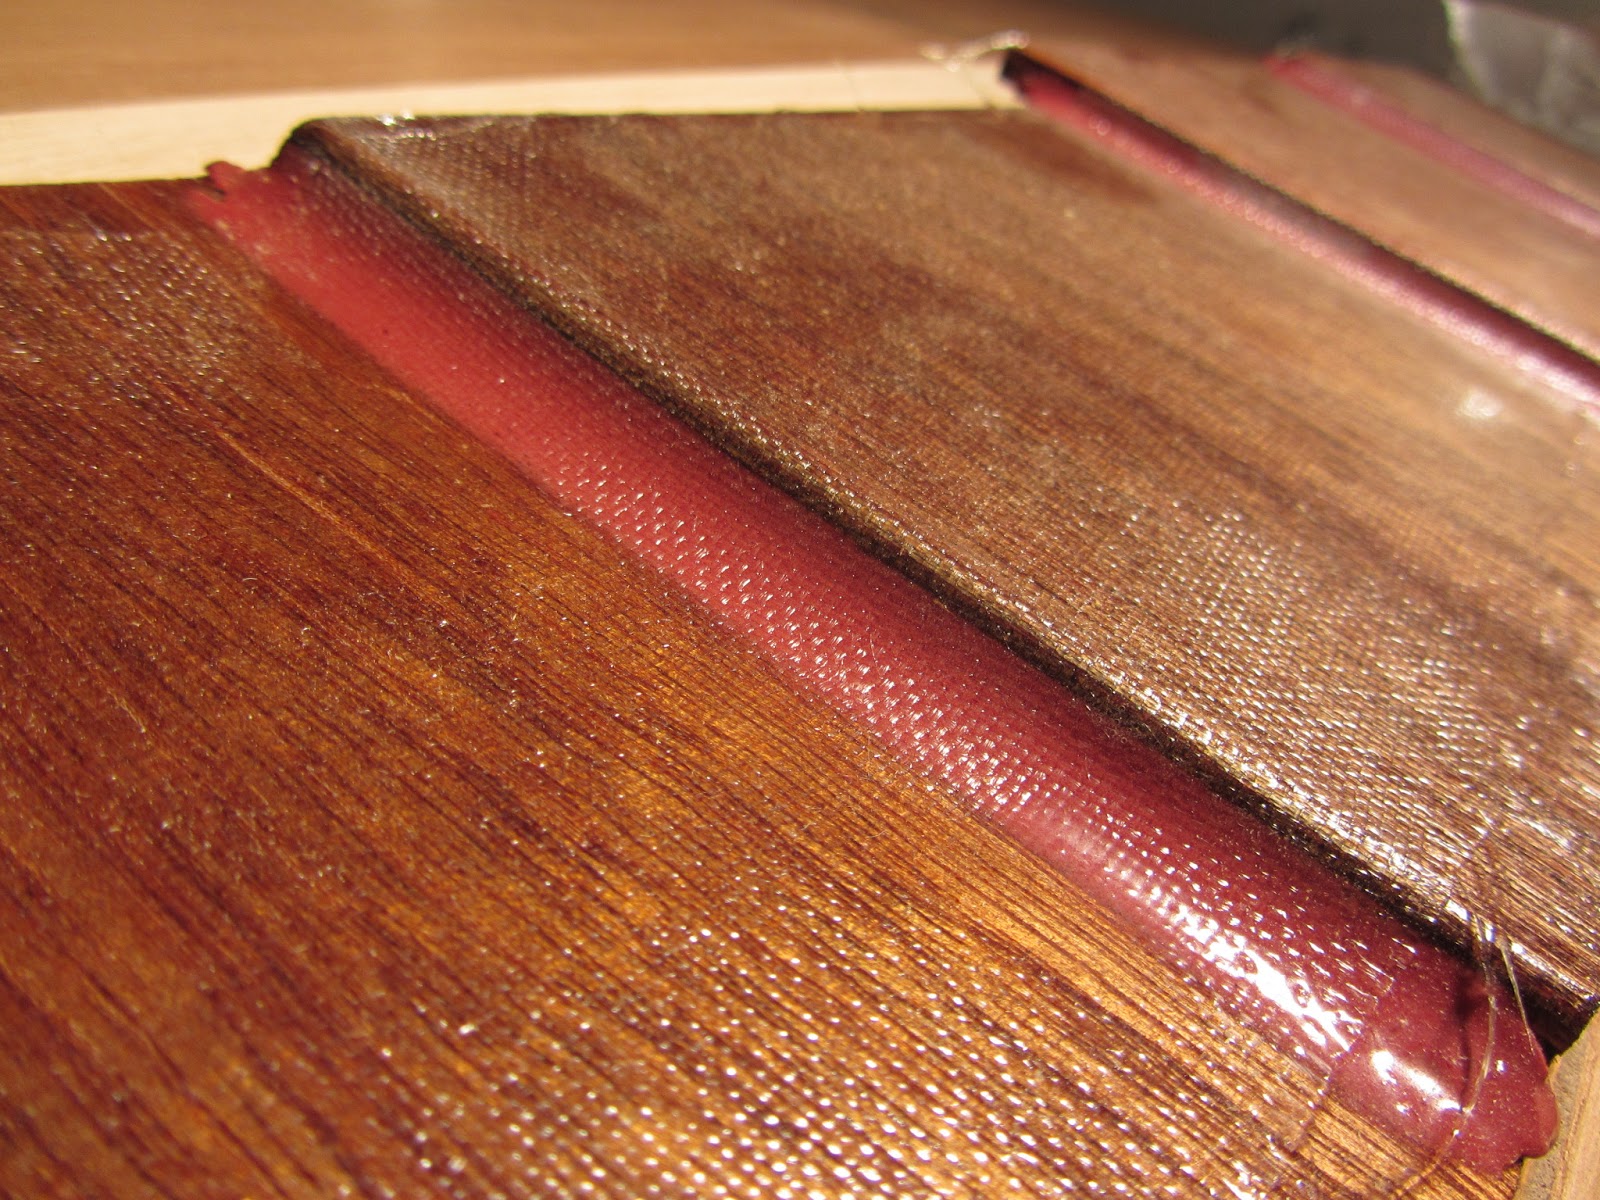

The cloth clings nicely to both the inside and outside curves.
The fillet left by the tongue depressor was just too tight. I couldn't get the cloth to adhere. In some places it stuck, but in others it pulled away. You can see the light colored patch in front of the stick. There is a bubble of air underneath the fiberglass cloth.
The radius left by the tongue depressor is too tight!

The cloth did actually adhere to the tighter 1/8 inch roundover, but not without a lot of careful work. The thought of trying to get a 20' long piece of cloth to cling for the full length is not appealing. Indeed, even with the more gentle 3/16 radius, it may be a chore to get everything right. This is compounded by the fact that I plan to use one continuous piece of cloth to cover each side of the boat - all six seams. (Well, except for a lens shaped section near the keel that I'll have to go back and cover after the sides are cured.) This will be two long days of epoxy work.

Tuesday, October 9, 2012

Epoxy Test Pieces

When I began my boat building project, twelve years ago, I ordered two gallons of epoxy and two gallons of hardener from System Three Resins. I figured that would be enough to get me trough coating the hull.

In response to the question "What is the shelf life of your epoxy resin products?" The System Three product FAQ has this to say:

All solvent-free epoxies have essentially unlimited shelf lives so long as they are stored in sealed containers. The resin may crystallize or the hardener may darken but this does not affect its performance. If the material is more than a year old do a test to satisfy yourself that it cures properly.

Twelve being more than one, I did just that. I mixed up some epoxy and glued up some test pieces. I mixed a batch of straight epoxy, and a second batch to which I added wood flour (basically sanding dust, much finer than saw dust) until it had the consistency of honey. (The consistency of epoxy mixed in this way is measured on a scale from honey, through molasses, and all the way to peanut butter.) I glued up two test pieces, one of solid wood (pine), and one of the meranti marine plywood I'm using for the planking. In each case, both sides of the joint got a coat of the unthickened epoxy. Then I coated one side with the thickened epoxy and joined the pieces, clamping until there was some squeeze out all around the joint.

A couple days later (it was a little chilly, I wanted to give the epoxy all the time it needed to cure) the epoxy left in the mixing bowls had cured as expected. After some encouragement, I was able to pop out two epoxy disks.

The foam brush and tongue depressor are, of course, permanently embedded in the epoxy. You can see the tip of a tongue depressor in the disk of unthickened epoxy. It wasn't strong enough to break the bond of the epoxy with the plastic bowl. There was a small patch of uncured epoxy - just a thin film less than a square centimeter - left behind in the bowl of unthickened epoxy. I assume it was not completely mixed.

But what about those joints? How strong were they? I rigged up a destructive test using my face vise and a pipe clamp. The picture below was taken just after I heard the first "crack" from the joint.

Not long after that, the piece broke, but you can see that the plywood separated between the plies, not at the glue line.

In the second picture, you can see that the joint in the pine also split along the grain, not at the glue line. I rate this test a success! That's good, because I still have about $200 worth of this stuff. I'd hate to have to replace it, but even worse, how would I throw away three gallons of epoxy and hardener that wouldn't cure? It's hard enough getting rid of old paint. It's good to be able to file this under "Problems I Don't Have to Solve."