Showing posts with label planking. Show all posts

Tuesday, June 11, 2013

Spring has Sprung

Well the worst of the cold weather passed with the end of March. April was a busy month, and a good bit of May was spent recovering from April. I did get to do some cleaning up. It's surprising what just a couple months of "I'll just put this here for now," will do. I have things looking much more organized now, but I couldn't get everything cleaned up before the urge to Do Something overcame me.

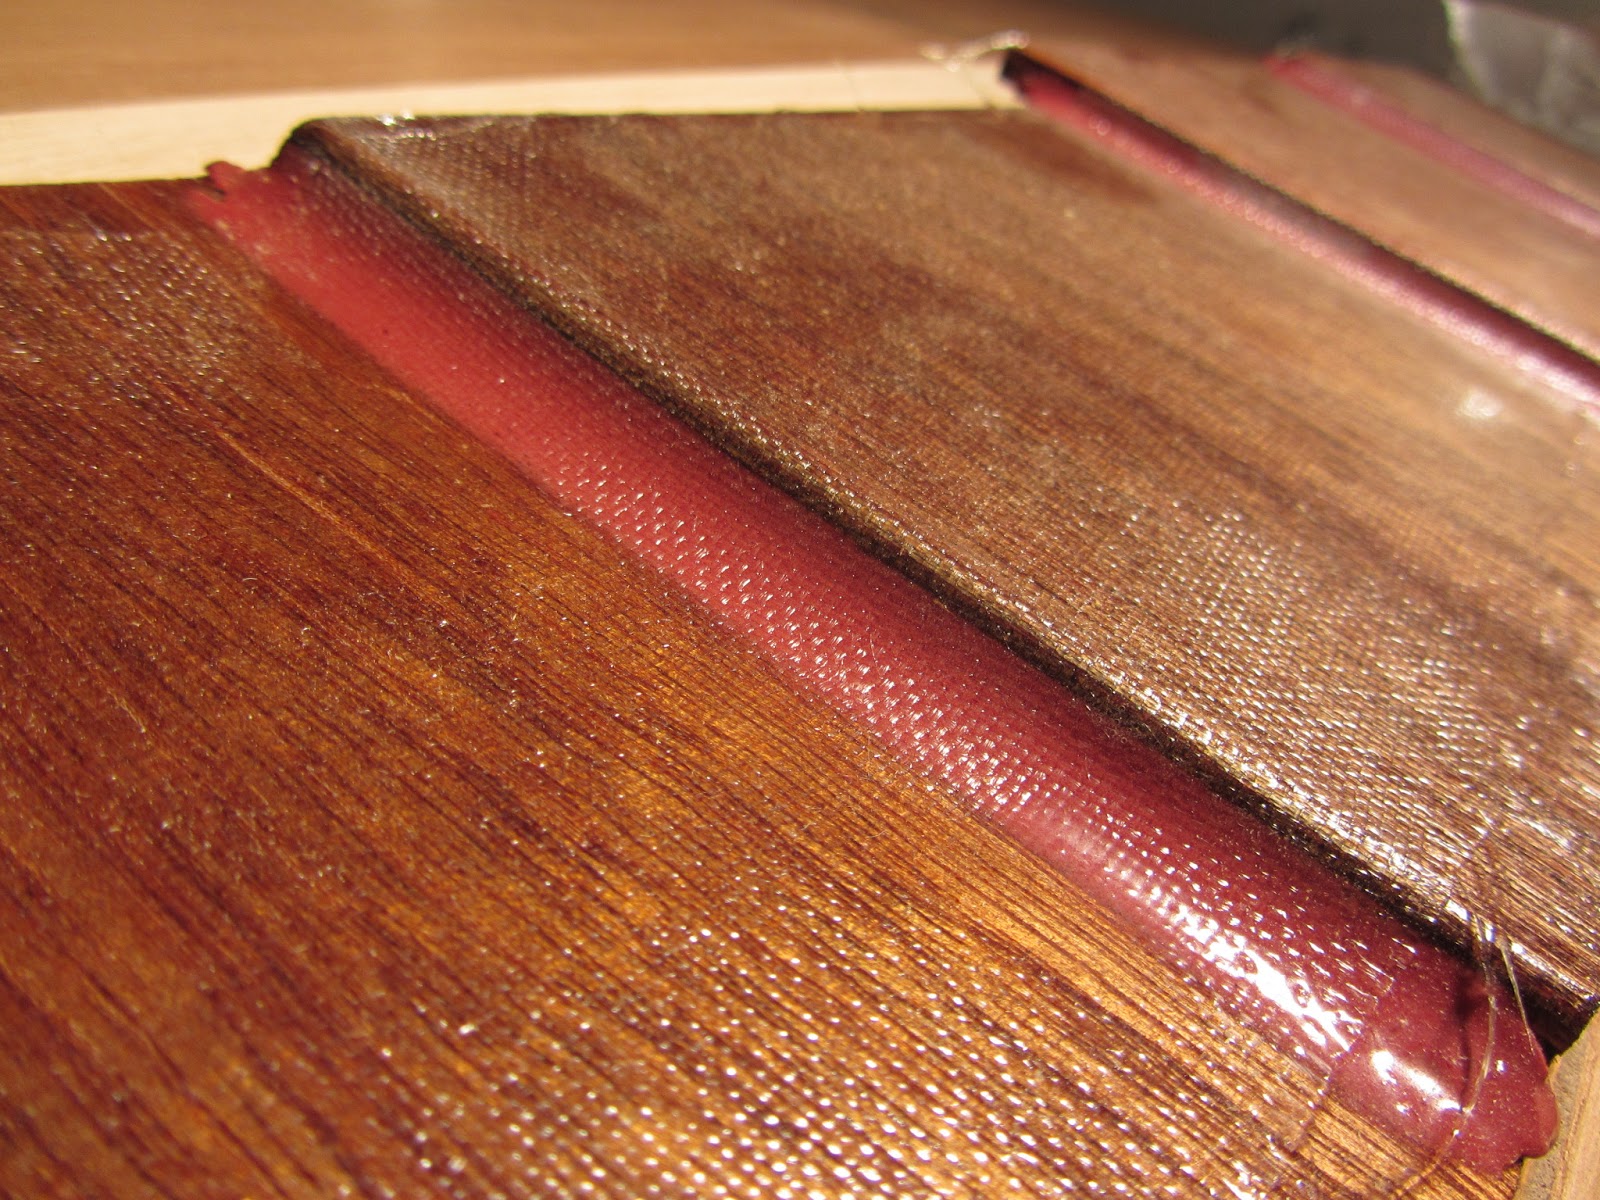
Experimenting with fiberglass cloth over the plank lands.

I'd been thinking a lot about how to finish the hull, and had decided to put a fiberglass skin over the plywood, but I wasn't quite sure how I wanted to do it. Other builders have put fiberglass and epoxy on each plank separately. This protects the faces of the plywood, but less protection to the more delicate edges. It allows the builder to keep the traditional "clinker" look where the planks overlap, but does not add any additional strength to that joint.

My main reason for using fiberglass is to protect the edges, so I've been thinking about using a continuous layer of fiberglass cloth to cover the planking. I'm also interested in the additional strength this will add. The epoxy glued overlaps are, in principle, plenty strong. In all my destructive tests, the plywood failed before the epoxy bond. But I know I have a few places where there is a gap between the planks that the epoxy didn't fill completely, though. The angle of my plank land must have been off a little bit. I've gone back to fill these in, but, as I'm planning to use the fiberglass anyway, a little extra piece of mind can't hurt.

I don't want to round over the edges of the planking more than I need to, so I made up a test piece from some scrap.

My System Three squeegee makes an appropriately sized fillet.

I rounded the corner with either a 1/8 inch radius or 3/16, and made a fillet with either my System Three squeegee or a tongue depressor. I'm using the lightest weight cloth I could find, 4oz., so it would conform more easily to the curves. The 3/16 radius with the squeegee worked all right.  It took a little massaging to get the cloth to adhere firmly, but in the end it did.


The cloth clings nicely to both the inside and outside curves.
The fillet left by the tongue depressor was just too tight. I couldn't get the cloth to adhere. In some places it stuck, but in others it pulled away. You can see the light colored patch in front of the stick. There is a bubble of air underneath the fiberglass cloth.
The radius left by the tongue depressor is too tight!

The cloth did actually adhere to the tighter 1/8 inch roundover, but not without a lot of careful work. The thought of trying to get a 20' long piece of cloth to cling for the full length is not appealing. Indeed, even with the more gentle 3/16 radius, it may be a chore to get everything right. This is compounded by the fact that I plan to use one continuous piece of cloth to cover each side of the boat - all six seams. (Well, except for a lens shaped section near the keel that I'll have to go back and cover after the sides are cured.) This will be two long days of epoxy work.

Sunday, January 13, 2013

Cleaning Up the Seams, Continued

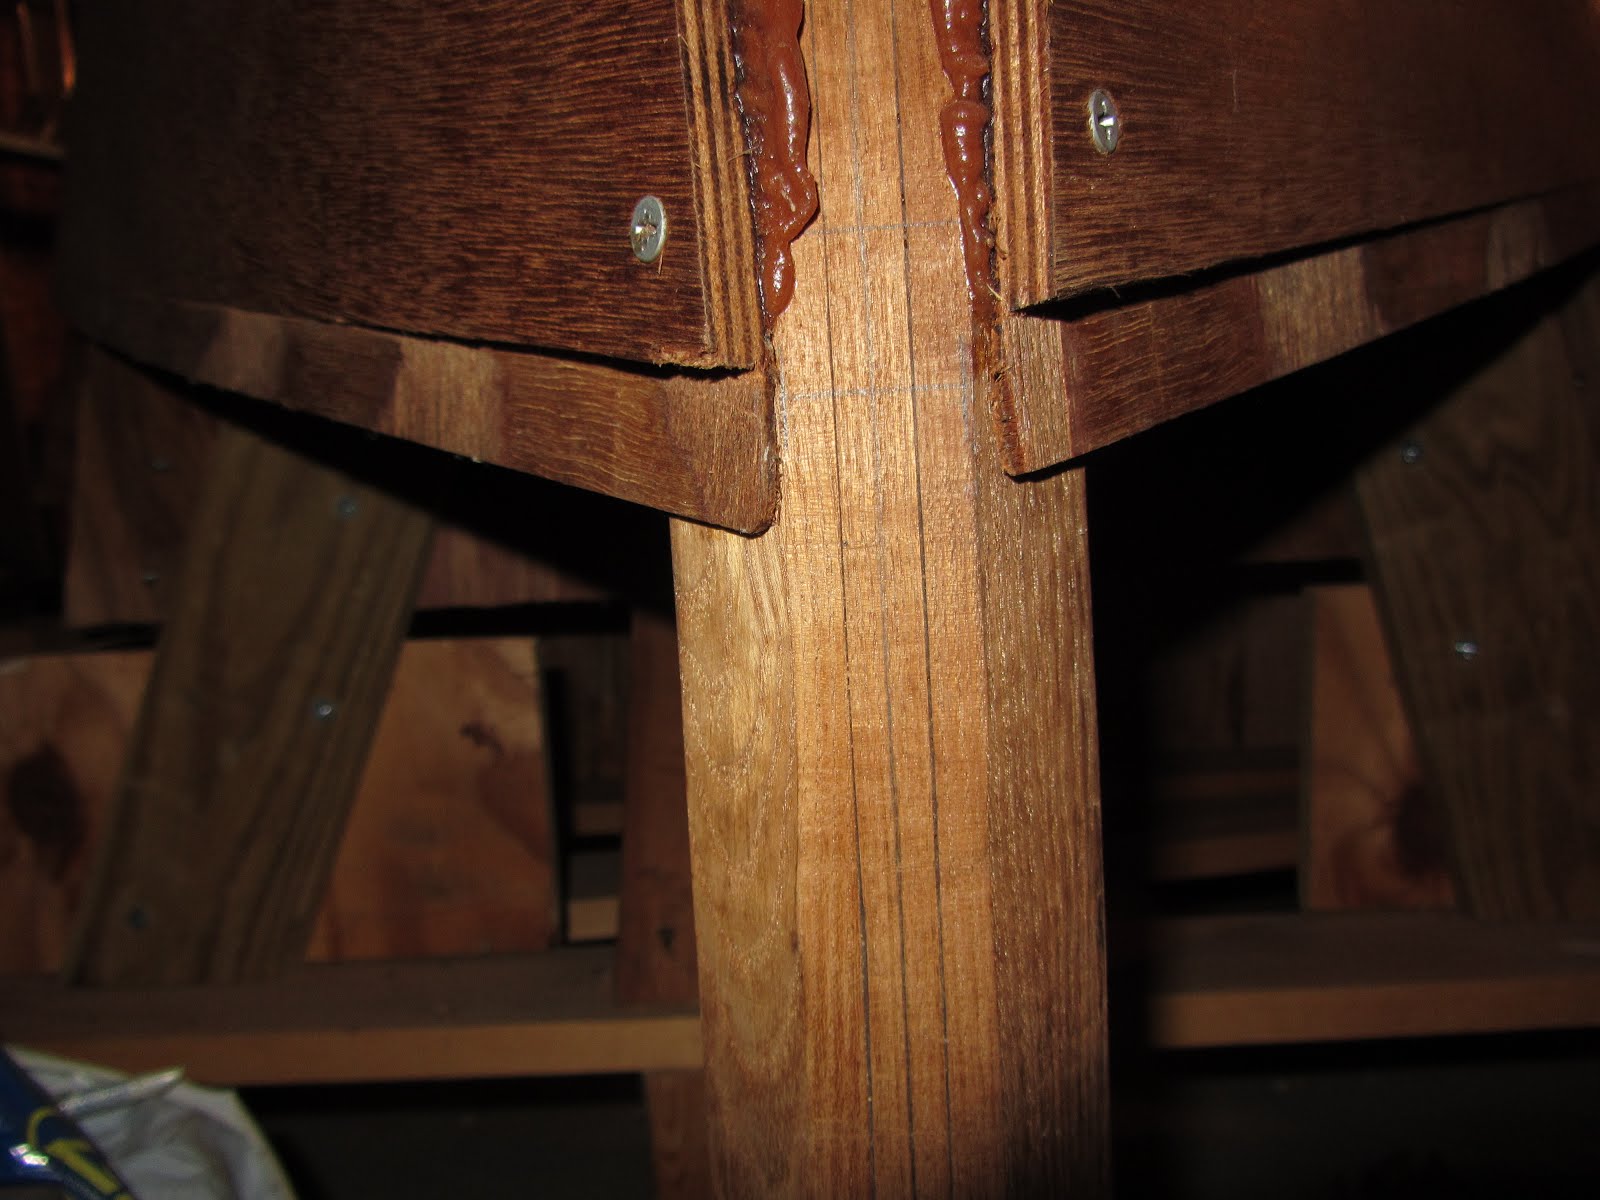
Well, several weeks have gone by, with more holidays and more guests. The rebate plane turned out to be a good idea, and made pretty quick work of what I had feared would be a long and painful task. The clearly articulated three step process for cleaning all the squeeze out from the seams was not, in the end, the best approach for most of the boat. As I worked along, I developed a slightly different approach: just do whatever seems to work best.

The epoxy that squeezed out had different consistencies, depending, I guess, on how much wood flour I mixed in, and how much it had cured before I got the plank into position. I ended up going back and forth between working toward the plank edge and working toward the face of the next plank. In places where the epoxy formed a convex "bead," everything went pretty smoothly which ever way I approached it. If the epoxy had settled into a "fillet," though, the plane would want to ride up out of the corner. Sometimes I would change directions back and forth, sometimes I would plane down to the wood in one direction, then turn and plane away the rest of the epoxy from the other. In the end, it went pretty quickly, and pretty successfully.

I did notice two things as I worked along. This was the first time I had really, carefully, looked over the whole hull since beginning this project so long ago. First, my level of craftsmanship has increased dramatically. The more recent planks have much cleaner edges than the earlier ones, which have some wavy lines. I was able to smooth some of the earlier ones while cleaning up the epoxy. Mostly, though, I figured these will be below the waterline and no one will ever see them anyway. I'll get to clean them up a little more when I round over the edges in preparation for putting a fiberglass skin on the hull.

Second, there are a few places where the seam is a little glue starved. I'll need to go back and use a syringe to fill some gaps. I still need to fill a ton of screw holes along the keelson. This will just add a little to that part of the project. The only area I'm concerned about is between the fifth and sixth plank near the starboard bow. There is a 2 to 3 foot stretch where I can see light between the planks. I need to figure out how to get a good bond between those planks. I'm thinking of taping the bottom of the seam and letting some unthickened run into it. Maybe use screws to pull the planks together while it cures. The gap is small - less than a millimeter, but with unthickened epoxy, I guess it's probably better to minimize the gap.

Friday, December 14, 2012

Cleaning Up the Seams

Things have been a little slow in the boatshop these past couple weeks. After working hard to get the planking finished, I had to devote some energy to catching up in other areas of my life. Visits from out-of-town guests and Thanksgiving holiday activities filled my schedule. I also have a day job that requires me to do, you know... work.

...And... we signed on a new crew member. He made his mark on November 26, with a rating of "Ship's Baby." This has, among other things, thrown off our normal schedule of watch keeping.

I've been getting back to work in the shop, though, and cleaning up the glue seams at the plank lands. I was not diligent about taking care of this as I went along, and so now I have a job before me. I cleaned up one seam with a chisel, spreading the work over a couple nights. It went well enough, but was tiring for my fingers and wrists.

Tonight, I had the thought of using my rebate plane. I took off all the guides and cutters, so the plane blade can cut cleanly into a right angle corner. I finished a second seam without difficulty. Some areas need more attention than others, and I'm still trying to get the hang of it, but my basic approach is this: (1) clean up the bottom edge of the upper plank, which is facing up, since the boat is upside down, (2) use the edge of the plank as a guide for the plane while working away at the squeeze-out, (3) gradually change the angle of the plane until the blade is parallel with the lower plank. Moving along in this way, the job goes pretty quickly.

I'll try to get some photos after I work on this technique a bit more. I've done two of twelve seams. I should be an expert just about the time I finish.

Monday, November 26, 2012

Hanging the Sheer Strakes

With the planks glued up to full length, it is very nearly time to glue them to the boat. There are just a few things that need to be tended to first.

First, the plank lands have to be shaped. There is very little angle between the sixth strake and the sheer, so not much has to come off, but it needs to be done. I do this with my power plane; you can see the setup here. I clamp a batten to the moulds, along the sheer. A length of threaded rod is tightened in the hole for a guide rod. The end of the threaded rod has a short length of 1 1/4" dowel with a hole drilled through it's center. The hole is just the right diameter that if the plane and batten are set on a flat surface, the dowel will ride snugly on the batten. Thus, the bottom surface of the batten and the cutting surface of the power plane are in the same plane.

It works all right. The position of the rod needs to be adjusted as you go, and it takes some effort to work around the clamps, but it's not too bad. Of course, I always control the plane with two hands. This photo is staged, with one hand holding the camera, and the power plane unplugged. The biggest temptation is to try to take off too much wood too fast. Take it easy, and work carefully, especially on the shallow angle of this last strake. Do I take my own advice? No. But epoxy can hide a lot of things...

When I worked on the planking up to this point, I made every effort to keep the two sides of the boat symmetric. Nonetheless, errors crept in, and more on one side than the other.

Here you can see the stem, with the planking on the port side about 3/8" lower than the starboard. I had hoped that errors on one side would be balanced out by errors on the other, but it didn't turn out that way. Since the sheer strake has to exactly match the sheer line at the stem and frames, there is no room for slop on this plank.

Here you can see a test fit of the port side plank at the stern. Like the bow, it is a little lower than the starboard side. So the port side plank needs to be reshaped a bit to fit into the gains cut into the sixth plank at the stem and stern. Of course the plank has to be reshaped quite a bit along it's length to keep a fair curve. I marked the new edge at the end of the plank, and then used a batten to make a fair curve into the edge of the plank about 5' or so in from the end. This was cut out with a saw, and then brought down to the line with a hand plane. After a few test fits, and checking the curve by eye, everything fit into place. This all had to be repeated at the bow.

Next, it is time to cut the gains in the sheer strake. The purpose of these gains is so that the overlapping planking at the bow and stern will lie flat, in line with the stem and stern posts. It is possible to cut these on only one of the two planks but I didn't like the idea of trying to clamp the planks in place without damaging a feather edge on one of them. There is a lot of twist in the first few planks, and a lot of that pressure is on the edges. I've made a practice of cutting the gain through five layers of the plywood on the lower (earlier) plank, and then through two layers on the upper (later) plank before it is glued in place. This seems to have worked pretty well. Here you can see that I cut the gains with my Record rebate plane.

These things having been done, it is finally time to glue the planks to the hull. This always takes much longer than it seems like it ought to. It helps to have everything laid out in place and ready for quick application. The real problem isn't the time it takes to clamp things in place, though. The problem is that it takes an awful long time to (1) coat the edge of the plank to be attached with unthickened epoxy, (2) coat the plank land on the hull with unthickened epoxy, and (3) get a good layer of thickened epoxy on the plank land.

I begin by doing a dry fit, clamping everything in place, and making sure that the plank is lined up just where I want it. Then I drill a pilot holes for three screws to hold the plank to the stem post and three at the stern as well. These screws are temporary, and will be removed after the epoxy sets. Then I make some register marks - lines on the edge of the plank that continue onto the hull. Once everything is epoxied, matching these lines ensures the plank is in the correct position, or very nearly. Driving in the screws ensures it is just where I had it for the dry fit.

I usually begin with a coat of unthickened epoxy on the plank land. I brush it on with a disposable foam brush. It goes on more easily if the epoxy is warmer, but then it kicks off faster, too. I use System Three's "ketchup dispensers" to measure my epoxy. One squirt of epoxy and a half squirt (they have a little clip that limits the dispenser to a half-squirt) of hardener is plenty to coat both the plank land and the edge of the plank. But you have to work quickly, or it will start to gel before you are done.

Then I mix up a batch of thickened epoxy. I have a big tub of wood flour from System Three. I find the perfect measuring tool is the scoop that comes with powdered baby formula. For a squirt-of-epoxy-and-half-squirt-of-thickener mixture, one of these scoops of wood flour makes a slightly-runnier-then-honey mixture, two and a little bit will make a thicker mixture that won't run, even on a vertical surface. It takes several batches to cover the whole length of the boat, but I mix them one at a time. The epoxy cures more slowly spread out on the boat than in the mixing bowl. Invariably I end up needing just a little bit more, and end up wasting most of a batch. Oh, well.

Then it is time to bring the plank to the boat and get things lined up as best I can. First I get it "close" and attach on C-clamp near the center, at the 5th or 6th station. Then I get the edge lined up correctly and attach another clamp. Then I work my way along, attaching a C-clamp at each station mould, checking the alignment as I go. I screw a small block to the mould to give the clamp something to hold on to.

Then I screw the plank to the stem and stern posts, check the alignment again, and begin clamping the joint using plywood clamps and wedges. Finally I check the alignment once more, and go get something to eat.

Tuesday, November 13, 2012

Gluing the Scarfs

Well, this

is where I left things in the previous construction post. From the start of construction, I had planned to paint the hull. Consequently I had not been concerned with matching the grain or color of the planking stock.

Interestingly, the "meranti" plywood I'm using seems to alternate between layers of lighter and darker wood. The lighter wood seems a little less dense than the darker - almost like the ocume plywood I used to build a kayak, once upon a time. Most sheets have the darker wood on the outer face, but some have the lighter. You can see the difference in the pictures that show the hull. The color of the darker plies can vary considerably, too, even on opposite faces of the same sheet.

Well, the thought had come to me that I might like to leave the sheer strake finished bright, while painting the rest of the hull. I very carefully chose plywood that had face veneers with matching color, at least on one side. Unfortunately, though, when I traced the patterns for each section of the plank, I didn't pay attention to which side was up. Once I cut out the sections, there was no way to line them up so the colors matched correctly. Oh, well. Paint it is.

Now you may have seen in the post about my scarfing jig how I cut the scarfs to join the four parts of each plank together. So, the scarfs having been cut, it is time to start gluing the planks to full length.

If you look in the lower right of this picture

you can see a pencil line on the edge of the plywood. This marks the center of the scarf, and, when gluing up, aligning these pencil marks makes sure the plank will fit properly on the boat.

The process is pretty straight forward. First, I coat each face of the scarf with unthickened epoxy. Then I add wood flour to the remaining epoxy until it is about the consistency of honey or molasses. One face of the scarf gets a coating of this thickened epoxy and then the scarf is lined up...

...and clamped into place. The small silver clamps keep everything aligned, while the larger C-clamps put pressure on the joint. Wax paper between the joint and the scrap wood keeps the whole assembly from sticking together, and also leaves a fairly smooth surface that requires only a little cleaning up. First I use the small clamps to hold one side of the joint against a board underneath (with the scarf face up). After applying the epoxy, the other side is lined up, and clamped to the same board, holding the joint steady. Then the larger clamps are added, squeezing the joint between two pieces of scrap large enough to cover the area of the joint.

That's the theory, anyway. It's worked beautifully for the first 40 or so joints. Halfway through this final plank, though, something went amiss. I don't know if my pencil line was off, or if the setup slipped while I was gluing it up, but when I checked the next-to-last scarf to see how they fit, they didn't. Aligning the section of the plank with frames 3, 4, and 5 put things out of alignment by a couple inches at the bow. No way to finesse that!

So I cut one end of the joint off, shaped another plank-piece using the same pattern as before. (Is there a term for the sections of plywood that are glued up to make the full length plank? It seems like there ought to be.) Recut the scarfs. (It was sort of interesting to cut down to the glue line in the old piece.)

I didn't want to make the same mistake again, so I decided to glue the last four scarfs on the boat, like everybody else does. It wasn't as bad as I feared. It required a little more clamping ingenuity, and a little more effort to clean up the squeeze-out. All in all, though, not too bad. The full length planks seem to have a slight kink around the joint that I had to cut apart, but on the boat it looks pretty fair. I may have to adjust the sheer a little after I turn the boat over. Oh, well. I'm building a boat to use, not a museum piece, right?

Saturday, October 13, 2012

Shaping the Final Plank

Here is where we left things in the last construction post:

The patterns for the sheer strake had been cut out and shaped. Now it is time to get out the marine plywood. This seems like a big step, a momentous occasion. I'm really working on my boat again. When people ask me "How is the boat coming along?" I no longer have hang my head and admit that it is not coming along at all. I can look them straight in the eye and say "I'm working on the sheer strake. After that it's the stem and stern posts and the keel. Pretty soon, I'll be turning it over!"

Well, maybe I shouldn't get ahead of myself.

I traced out the patterns onto the plywood. After that I cut them out with my jig saw. I know that lots of people say that the jig saw won't cut a straight line, that it wants to wander. It's certainly true that I can't follow a line as closely with the jig saw as I can with my band saw, but it seems more like my fault than the saw's. It goes where I direct it, it's just harder to direct than the band saw. In any case, I saw about 5-10mm away from the pencil line. The fibers of the top ply tend to chip out, especially when cutting across the grain.

Here we see an "action shot" of my jig saw. I don't know how old it is, but it was my grandfather's before it was mine, and it is a heavy duty piece of machinery. No plastic body on this one! It runs fine, though it gets a bit hot when I run it for a long time, and it takes a while to cut out these planks. In the end, I use the jig saw to separate the planks from each other, and cut close to the line using the band saw. I didn't happen to get any pictures of that, but it you imagine someone using a band saw... that's pretty much what it looks like.

Finally, I used my router to trim the planks to the exact size of the pattern. The natural thing would be to use a template bit to do this. I don't happen to have one of those. I do have a flush trim bit, though. It's basically the same thing, but with the bearing on the bottom instead of the top. It's not quite long enough to cut both planks (port and starboard) at the same time. Oh, well. I like doing this, right? I get to do twice as much. In the end, I have two planks that exactly match each of the four patterns.

Next step... Cut the scarfs and glue the planks up to their full length.

Tuesday, October 2, 2012

Sheer Strake Patterns

With the building frame leveled, it's time to begin work on the sheet strake. I know some folks have had success making full length patterns by running two battens to mark the edges of the plank and attaching cross braces to make a rigid structure. I tried that early on, and it didn't seem to work well for me.

The Eun Mara is a 20' long boat. The planks are made from 8' long sheets of plywood. This means that each plank must be built from several sections and scarfed together. Now many people have had great success gluing scarfs on the boat. I never actually tried it. Early on I tried a dry fit this way. It was hard enough getting everything lined up, that I couldn't imagine doing it again with epoxy all over, trying not to make a mess, and hoping to get everything into place before the epoxy goes off.

I'm sure both these approaches are very sensible, and that if someone were to show me the correct way, I'd say, "Oh, that's how it's supposed to be done. I didn't have anyone to show me, though, so I had to work out something for myself.

I ended up making patterns out of 1/4" plywood, as described in Iain Oughtred's CLinker Plywood Boatbuilding Manual. But with an extra twist to help get the scarfs lined up correctly. My method is as follows:

A sheet of 1/4" plywood is bent around the boat, roughly where the plank will be. The 1/4" plywood from the home center is much lighter and easier to bend into place than the 9mm (about 3/8") marine grade meranti plywood. I climb under the boat, mark the plank lands at each frame, that is the corners on the frames that mark where each plank ends. These will be joined up with a fairing batten after the plywood comes off of the boat. I also trace the edge of the previous plank. This will not mark the edge of the new plank. The planks need to overlap, so another line, slightly above this one needs to be drawn. I didn't get under the boat to take pictures of this, so hopefully this all makes some sense. I also marked the location of the edge each station along the plywood. This helps with lining everything up correctly.

Early on in the construction, I made this gauge to mark the location of the plank lands. Here you can see how it is used to mark the lands on the previous plank, so the edge can be beveled correctly to mate with the next plank.

Here you can see the same gauge being used to mark the edge of the new plank. It is placed upside down on the line traced from the edge of the previous plank. You can see the traced line running under the block. Then I make a pencil mark in the same corner as was used to mark the line in the previous photo. I mark several locations, then put a brad in each and lay a batten so it rests against each of the brads.

Here is the batten. It's held to the curve of the brads with a couple clamps. It doesn't always want to lie exactly along the brads, and some adjustments have to be made. If it's pretty close (within a pencil line) I wouldn't sweat it. It it's more than that one of the marks may be off. I never had too much difficulty. If you're having difficulty, well, use your best judgement. It's likely to be better than mine!

The pencil lines in this photo are a little hard to make out. The lower horizontal line marks the end of this section of the plank. The center horizontal line marks where this plank will lay across one of the station moulds. The upper horizontal line marks where the start of the scarf for this joint. Each end of each plank is marked like this for a 12-1 scarf. Those who know more than I do say that a scarf of 8-1 or 10-1 is sufficient, but 12-1 can't be any worse, and doesn't really use any more material. The two nearly vertical lines mark the edges of the plank. (It looks like there is another nearly vertical stray line.) The center lines, marking the location of the station, are marked onto the edges of the planks after they are cut out. Lining these marks up ensures that the glued-up plank will lay correctly on the boat.

After the pattern is outlined, it is cut out. First I rough cut with a saber saw, then I cut close to the line on the band saw. Here are the patterns for the four sections of the sheer strake.

Marking the scarfs in this way has one drawback. Because all the scarfs must lay on one of the stations, it limits how the planks can be divided into pieces. Some planks that could have been glued up from three almost-eight-foot sections end up being made from four shorter sections. It's not too much extra, though. I'd say I only ended up making six or eight extra scarfs on the whole boat. And some of the work is easier, involving smaller pieces that are easier to cut out.

Next I trace the patterns onto meranti plywood, rough cut them with a saber saw, and use a pattern bin in my router to give them their final shape.